20 Inspiring DIY Fall Decor Ideas
20 Inspiring DIY Fall Decor Ideas Fall is coming soon and that means fabulous fall decor. I love changing around decor in my home for each season. These 20 Inspiring DIY Fall Decor Ideas run...
We've all been there, we buy seasonal plants like chrysanthemums (mums) and poinsettias to put on our front porch during autumn and the holiday season. We've been gifted potted plants for a housewarming or holiday party. Alternatively, we've picked them up during a trip to the local farmers market finding inspiration from their large plastic outdoor planters. However, we aren't quite ready to plant them (or don't have a ‘pretty' pot to put them in). Or, maybe you rent your home (or apartment) and cannot plant those pretty plants we all want to have outside our homes. These pretty boxes are the perfect solution to hide those black plastic pots. We hope that this DIY Planter Box post inspires you.

It was a team effort to make this plant box with my son using a small electric saw to cut the wood, my partner making the legs and base, and then I put it all together and did the cosmetic touches.
Plastic pots come in a variety of sizes, so first decide what size you will use the most, or make plant boxes in a range of sizes, you could even make longer boxes to accommodate a couple of pots at a time, you'll just need a couple of extra pieces of wood at the base to hold the pots.
The first step is to cut your wood into the same size pieces, and then, cut a few a little smaller to make the base, and then assorted sizes for the legs, which you'll see below.
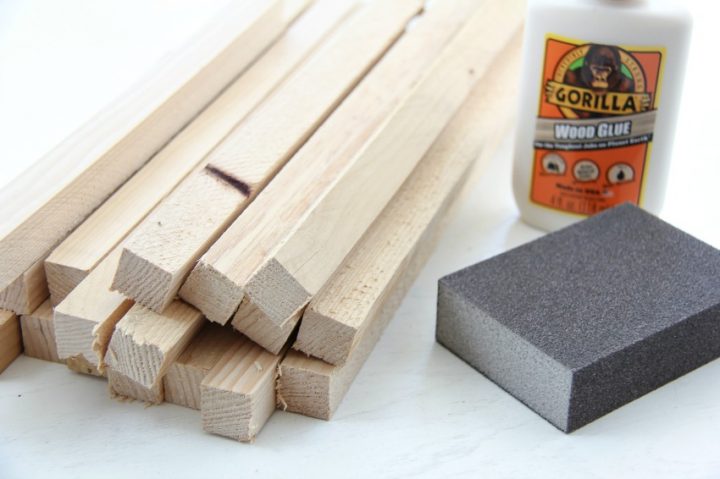
Sand the rough edges of your wood now, or you can wait until your project is assembled, just don't forget to do it before painting.
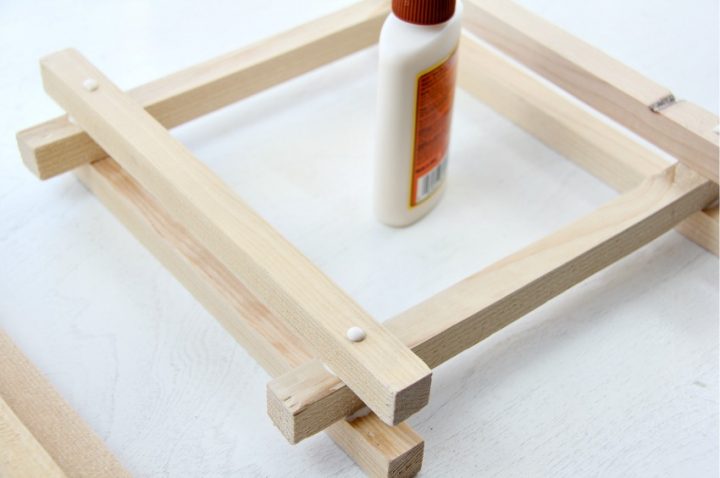
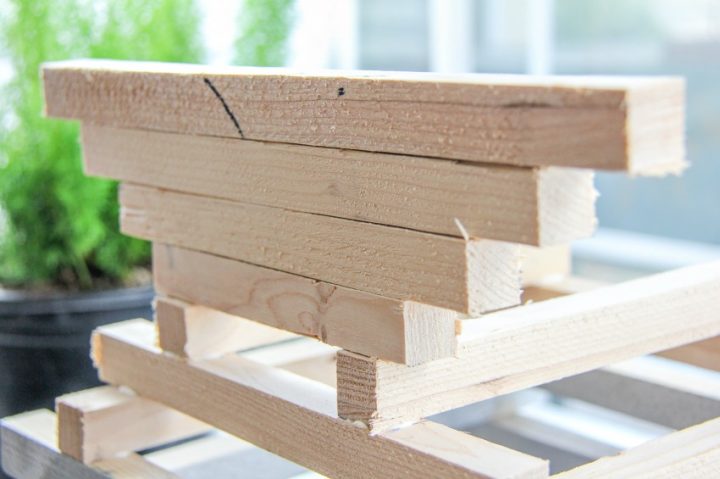
Begin assembling the main box section of your plant box by criss-crossing the pieces of wood, holding each together with wood glue. Keep building up until you've reached your desired height. I kept putting my plastic pot inside until I had it at the correct height.
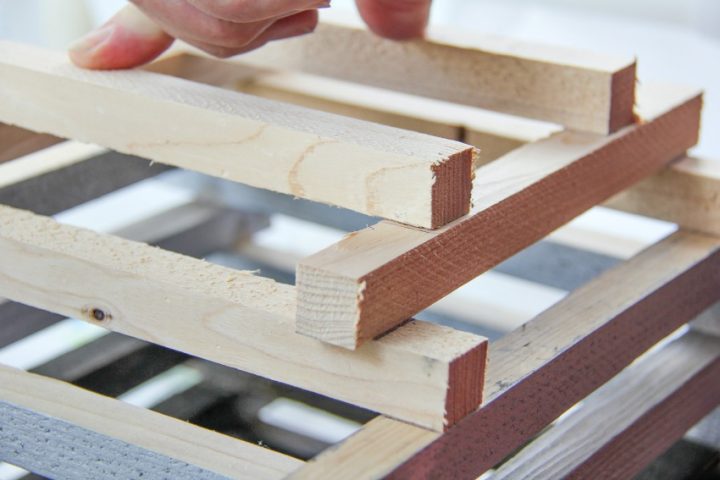
Once the wood glue is dry, turn your box over and add smaller sections to the base that the pot will sit on. This will help water to drain through the center and stop your plant from falling all the way through.
Then, you can start assembling the legs. Gluing each piece together with the wood glue. Pop something heavy on top and set aside until the glue is completely dry. I left ours overnight.
If you haven't sanded the rough ends, now is the time to do it, and then you can start painting. I experimented with paint for a few days. At first, wanting silver at the base and white on the top, then blue on the top and gold on the base, then I drove my partner insane re-painting over and over again so I settled on a shabby chic white finish, which I sanded after painting to reveal some of the other colors through the finish.

Apply a clear lacquer, this will help protect the wood from water and the weather, although you should still keep it under a cover whether it be your front porch or back patio.
The final step was to add crafting moss between the wood in the main box section, this adds a little color while still hiding the plastic pots. Use hot glue to keep it in place.

And the result is a pretty plant box that's the perfect addition to your outdoor space and that hides those plastic pots. We hope that you are inspired by this DIY Planter Box. Good luck!


20 Inspiring DIY Fall Decor Ideas Fall is coming soon and that means fabulous fall decor. I love changing around decor in my home for each season. These 20 Inspiring DIY Fall Decor Ideas run...

Patriotic Stars Exfoliating DIY Melt and Pour Soap Bars Homemade beauty products are quickly becoming one of my favorite things to do or DIY. There is an art (& Craft) when it comes to...

DIY Beaded Wire Star Christmas Ornament DIY Christmas ornaments are one of my favorite things to do at the beginning of each holiday season. I especially love diy christmas tree ornaments or easy diy...

Home Depot Do-It-Herself Workshops Have you tried out these Home Depot Do-It-Herself Workshops yet? I have tried several of these workshops so far and I absolutely love them. A few years ago I did...

This is such a cool idea. Those plastic pots are so ugly and this is a perfect way to NOT have to see them 🙂
This is really cute. I might need to make one. I’ve been looking for some cute planters to put on my patio, and I think this fits the bill. Thanks for sharing.
Okay this is adorable! I love how easy and stylish it looks. What a great idea! This would be cute for both indoors and outdoors!
This is such a nifty idea! I love that you can do this without screwing or drilling anything – I’m challenged in those areas!
Looks like so much fun! My husband builds a ton of wood structures with Gorilla Glue!
This is a wonderful idea. It turned out great too. I just love the way it looks. I need to make one too.
What a nice idea! This would look great out on my patio by my pool. I like the idea to make it instead for buying it plus it saves money too!
This is one of the most adorable plant boxes! I feel like I need one right now!
This is so clever and creative. I would do this to grow fresh herbs and spices
I’d love a few of these in my backyard – what a fun way to garden. They are adorable too!
This is so cool! If I could keep plants alive, I would definitely consider making this.
That’s a super cute DIY Project idea! I would love to do this! It’s especially great if you don’t have a big backyard for a garden.
I wonder if this would also help keep my pots from blowing over. I like this idea a lot.
This is such a fun DIY! I love the design of the planter, it’s gorgeous and would look great with my decor.
I really love this idea! Really gorgeous and easy to make!
This is so cool! I love how you covered the open slats with moss.
Oh, I love that and looks like something I really could do without my husband’s assistance! It looks so stylish!
You do such a great job explaining that I think I might actually be able to make one! I really like how nice this looks.
This is such a great idea! I wish I was better at growing things, I might have to give this a try for myself.
I Love the look of this. so much better than the plastic pots I have lined up in my side yard. Thanks for sharing
I love anything and everything DIY — garden style. We’re looking to spruce up ours before the summer. This would be perfect for our herbs.
I Love this idea to hide the, sometimes, ugly flower pots that plants come in. Plus this looks easy enough that I can do it myself!
Stunning plant box, this would be perfect for herbs! I am not going to plant anything this year, maybe next summer!
I love having plants in my yard, but the really decorative pots can be costly. This is a great way to get a stylish look without spending a zillion dollars.
Love this idea…easy to make and so adorable. This plant box would be perfect for my potted plants on our back deck.
This is a cool idea. I never liked the plastic tubs that most plants come in. But the nice ceramic planter pots are so expensive. Plus, this is unique and you can even add a pop of color too.
That is such a cute and easy design! It actually looks fun to build!
This is such a beautiful project. We just stayed at a hotel and they had something similar. My husband said he could make it and I thought he was crazy. I guess he was right. 🤷🏻♀️😂
This is such a great idea for a DIY project at home! I love the way it turned out.
This is a wonderful DIY. I love the stacked look and it really adds a nice touch to the outdoor section of your home.
I wish I had a Garden, still an apartment dweller. In NYC all I have room for is a bamboo plant! Small container and doesn’t require much water which is perfect because I travel a lot.
Love this DIY. Plants when they are displayed in a creative way are so decorative and add a lot of class to a home. It looks hard to make but you made it seem so easy.
Very neat idea. I’m painting everything white these days and I do like your paint. Those plastic pots are ugly, aren’t they?
This is so creative and unique. I will have to give it a try this summer when I am feeling crafty!
Such a pretty idea! This would be a nice weekend project for me and my husband. The plants on our front porch would look really nice once we’ve finished the plant boxes!
Oh my gosh, the plant box turned out so cute. I love the greeen showing through to make it feel like it’s always been there.
I did pin this. I am getting more into greenery and plants lately so this diy is something I would make soon.
I am the least diy-friendly person I know, but these boxes are super cute. I would attempt to try these for sure and if I couldn’t do it, Mr. Foodie to the rescue! lol
Your planter box is so pretty! You just gave me an idea how to give the potted plants in my patio a make over! Thanks for sharing this DIY craft.
Pingback: Easy DIY Pineapple Succulent Planter Gardening Plants
Pingback: Fall Front Porch Home Entryway House Decor Design
Pingback: Divine Lifestyle: DIY Plant Box - Tonya Staab
Pingback: DIY Plant Stands You Can Make This Weekend | Tonya Staab