Food Storage Benefits
Food storage is something that is a cause for concern for me. Living in the South, our environment here is very humid. As a result, food must be properly stored or it just goes...

Whether you’ve got a tired, old carpet or some linoleum that’s seen better days, upgrading to a beautiful wood floor will be nothing short of transformational.
While solid wood reigned supreme for centuries, many homeowners today are opting for engineered wood flooring, an alternative crafted from either softwood, plywood or high-density fibreboard and topped with a veneer of real wood.
Engineered wood boasts a number of benefits over solid wood, including underfloor heating compatibility and a lower price tag. It’s also much easier to install, making it ideal for budding DIYers.
Here, we outline some tips for laying engineered wood flooring in your home.
There are several installation options for engineered wood flooring, but the one that’s best for you will depend on the type of subfloor you’ll be laying your flooring over.
In a glue-down installation, the boards are glued directly onto the subfloor using a wood flooring adhesive. This method should be used if your subfloor is made from screed, concrete or chipboard.
In a ‘floating’ installation, the boards are secured to each other, rather than to the subfloor. This method is suitable for a range of subfloors, including concrete, screed, chipboard, wood and plywood. However, you can’t float a floor directly on top of joists, as the surface needs to be solid or flat for floating to be effective.
When using nails for installation, a powered flooring nailer is used. The nails go through the side of the plank and into the subfloor. This method works well for wood and plywood subfloors. It can also be used for installing flooring over a joist subfloor, provided the subfloor is at least 18mm thick.
Before you begin installing your flooring, you’ll need to make sure you’ve got all the tools and equipment for the job.
Aside from some top quality engineered wood flooring, you’ll need a moisture meter and spirit level for checking the subfloor before you begin installing your floor, and protective equipment such as knee pads and safety goggles.
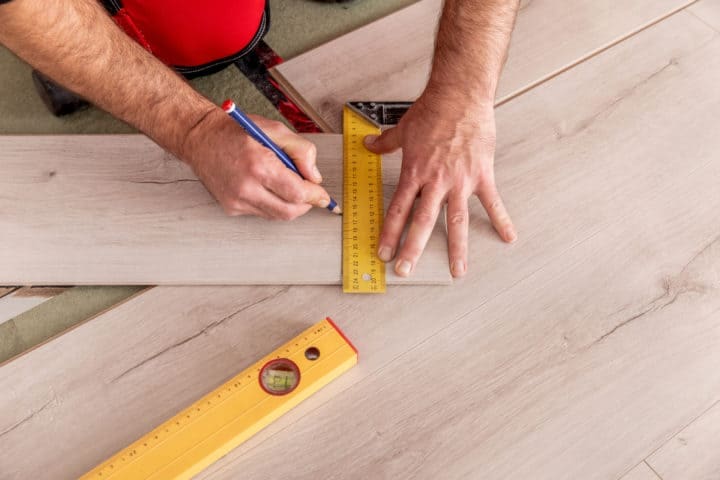
A tape measure, saw, pencil, hammer, knife and floor fitting kit will be needed to install the floor, and you’ll also want some threshold strips to finish the look once your flooring has been fitted.
Depending on the installation method you’re using, you may need some additional items, such as underlay and PVA joint glue (for floating installation), a flooring gun and nails (for nailing installation) or wood flooring adhesive (for glue-down installation).
Laying a new floor isn’t something you can just jump straight into. It’s crucial to take the time to properly prepare the area where your floor will be fitted to ensure you get the best results.
Remove any dust and debris from the subfloor, including any nails that are sticking out. Once the area is clean, you’ll need to check the moisture content of the subfloor using your moisture meter. Your flooring installation guide should specify the acceptable moisture content range for your subfloor.
If you’ve got the right result from your moisture reading, you can move on to checking your subfloor is even. You’ll want your subfloor to be completely flat with a maximum height variation of 3mm over 1 metre in length to ensure you achieve an even finish.
If your subfloor is too uneven to install your flooring over, there are a few things you can do to fix it. You can use a levelling compound or apply chipboard or plywood over the top. Your flooring supplier will be able to advise you on the best course of action for your subfloor.
Before you can begin laying your flooring, you’ll need to leave the planks to ‘acclimatise’. To do this, take your flooring in its unopened packaging and place it in the room where you plan to install it, ensuring the room temperature is between 15-25℃.
Stack the packs so that the air and humidity in the room can circulate evenly, supporting approximately every half metre to prevent the flooring from bowing or warping. Leave the planks stacked in the room for 3-5 days.
This process allows the moisture in the wood time to adjust to the moisture levels in the air and gives the planks time to shrink or expand as needed, which reduces the risk of any major changes to their size and shape after they’ve been installed.
The final step before you begin laying your new flooring is to check the appearance of each plank. Engineered wood is a natural product, which means it’s likely there will be some variation in the colours and patterns found in the planks.
It’s worth playing around with the different planks to work out how you’d prefer to arrange them before you start securing them into place.
Checking the planks will also allow you to identify any natural imperfections, such as knots or rings. Depending on the look you want to achieve, you may prefer to reserve any significantly imperfect planks for offcuts or wastage.
Hopefully this article has helped you get a good idea of what to keep in mind when installing your own engineered wood flooring. From properly preparing your subfloor to acclimatising your planks; if you follow these tips, you should have your beautiful new floor fitted in no time!