DIY No Sew “Thanks” Fabric Bunting
 DIY No Sew “Thanks” Fabric Bunting
This post is brought to you in partnership with Waverly Inspirations and its parent company, Iconix. I have been compensated for my time. All opinions and ideas are my own. We hope you love our DIY Unicorn Head Pencil Case. Read our full disclosure policy here.
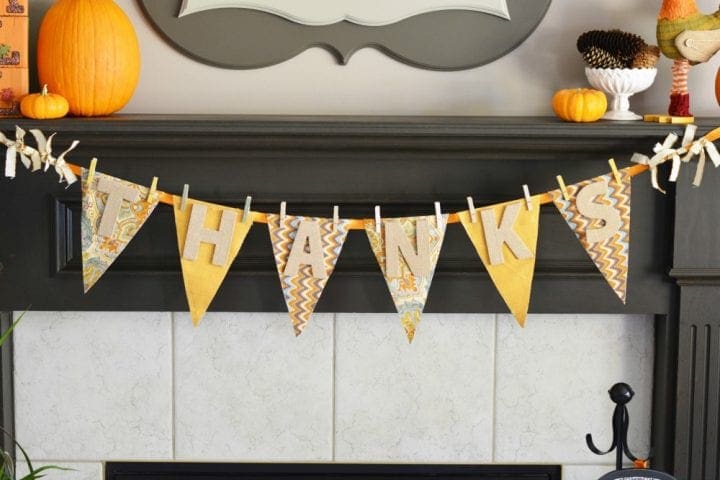
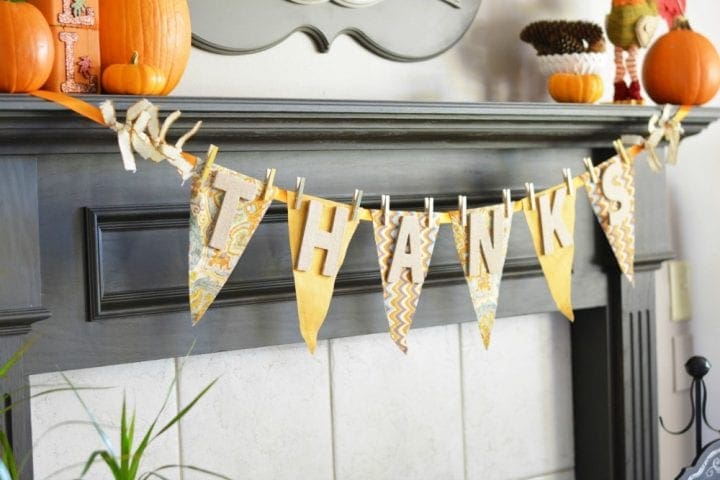
We are back with another fun DIY craft. This DIY No Sew “Thanks” Fabric Bunting is the perfect item to decorate your mantel for Thanksgiving. There is no sewing required and it looks absolutely amazing. The best part is that everything is available at Walmart so you only need to head to one store to get everything that you need for a fully decorated mantel.
 DIY No Sew “Thanks” Fabric Bunting
Materials:
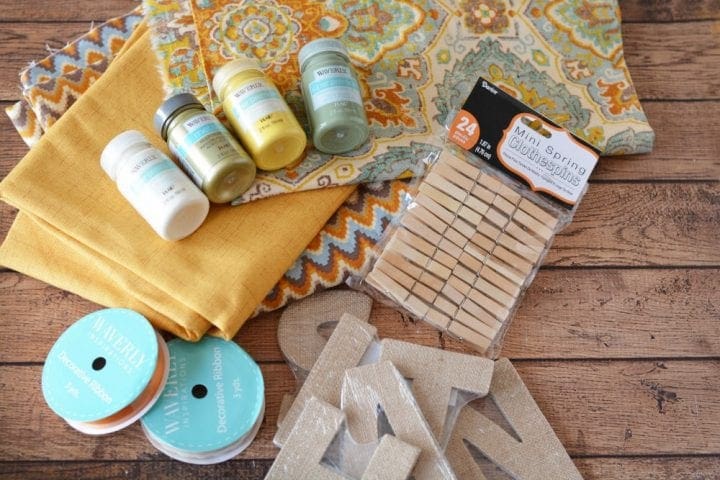
- Waverly Semi Gloss Acrylic Paint in Ivory
- Waverly Semi Gloss Acrylic Paint in Moss
- Waverly Semi Gloss Acrylic Paint in Maize
- Waverly Multi Surface Indoor/Outdoor Metallic Paint in Moonstone
- Waverly Ribbon 5/8″ in orange and cream
- Waverly Fabric in 3 different patterns/colors
- Mini Clothes Pins -Darcie Mini Spring Clothes Pins 1.87″
- Burlap & Wood Letters (approx 4″ x 3″)
- Scrap Paper
- Scissors
- Hot Glue

 Directions:
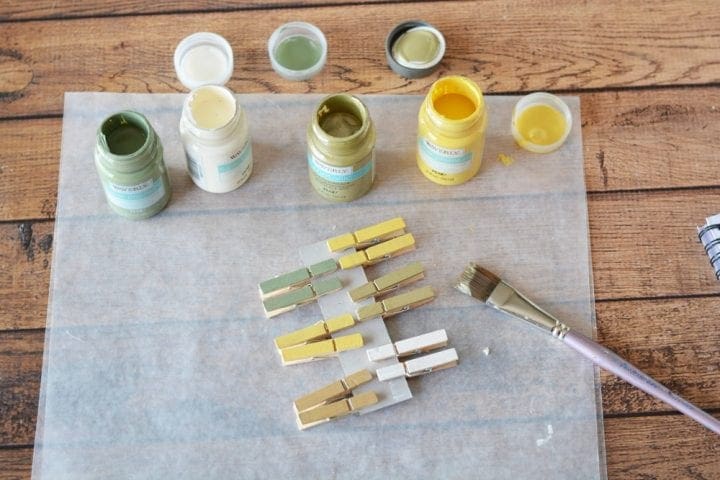
- Use the paint to paint 12 mini clothes pins. Leave them clipped to the piece of card board they came with so you can easily paint them. Set aside to dry completely.
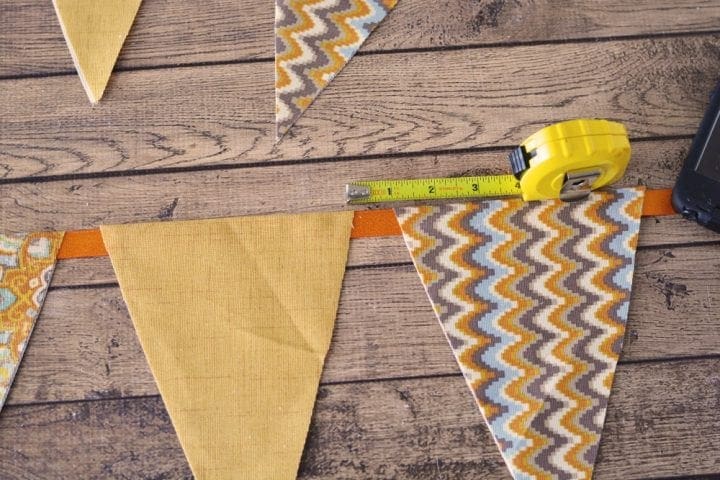
- Measure your space to display your bunting. Add 8″ to the measurement, about 4″ on each end for the knot/hanging.
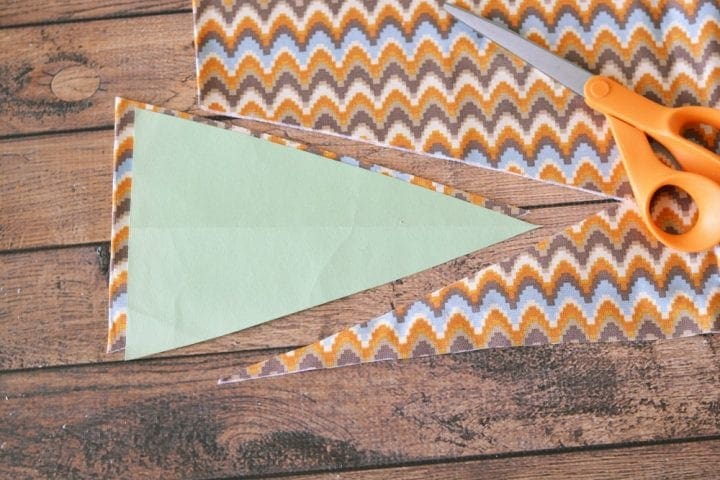
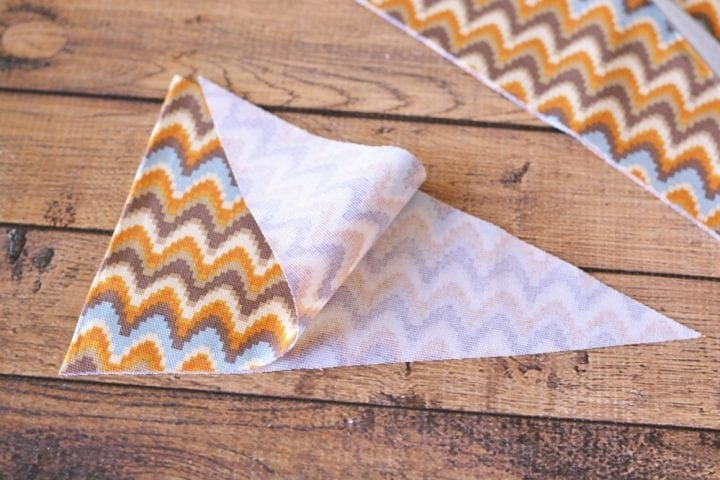
- Use a piece of paper to cut a 6″ x 9″ triangle template. Fold the paper in half, lengthwise, and cut a triangle. Open the paper to reveal the pattern.
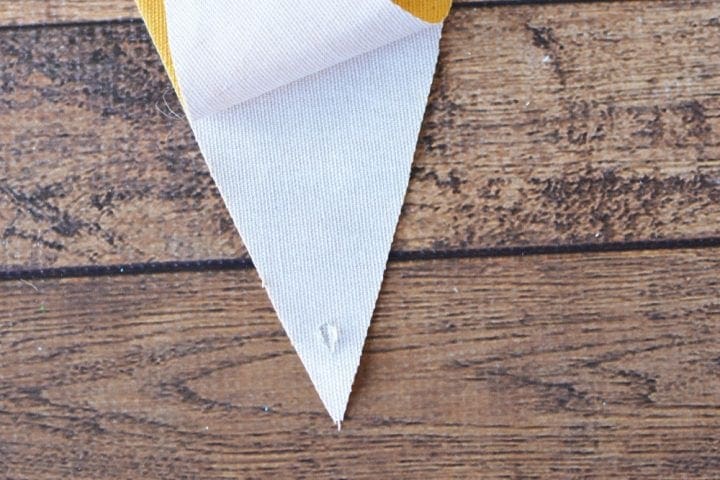
- Fold your fabric in half and lay the short end of the triangle along the fold. Cut the triangle out of the fabric, keeping the fold along the top. Repeat until you have 6 triangles cut.
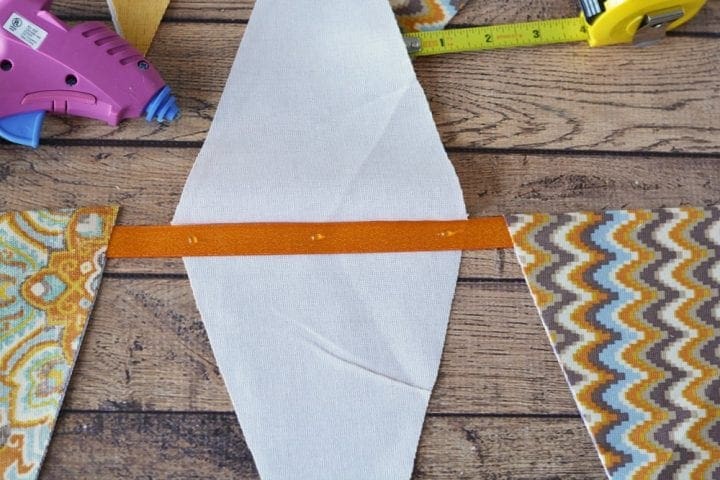
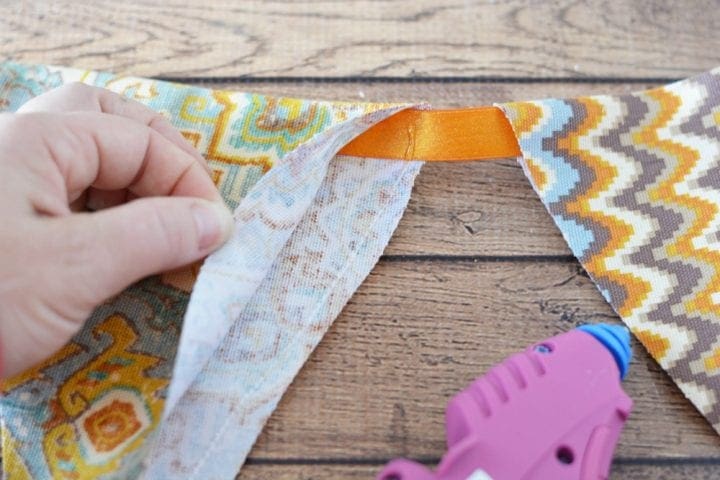
- Find the center of your ribbon, by folding in half and marking lightly with a pencil. Place 3 triangles on each side of your center mark, about 1″ apart. Tack the triangles onto the ribbon using hot glue. Secure the triangles together by gluing all the way around the triangle.
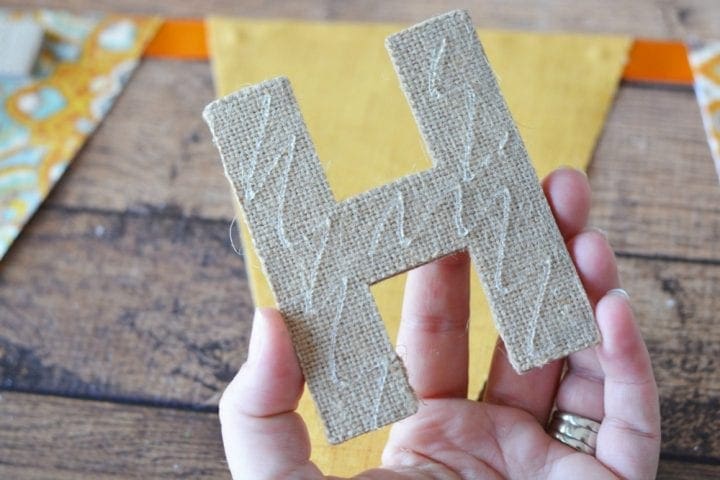
- Attach the burlap letters to the triangle with hot glue.
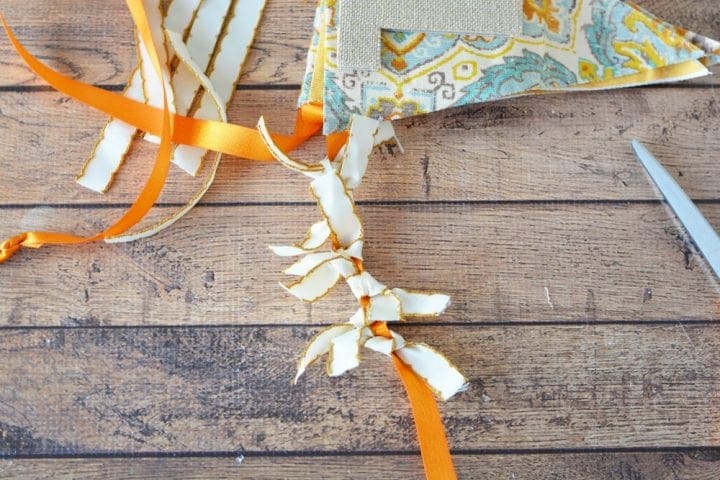
- Cut 12, 6″ pieces of cream ribbon. Tie 6 pieces of ribbon onto each end of the bunting.
Hang the bunting by tying a slip knot in each end of the ribbon. Attach the clothes pins (They are just for looks, they won't hold up the banner because the letters are too heavy).


About Waverly Inspirations
The Waverly Inspirations collection takes its design direction from its rich archives of American design and updates these patterns for today’s consumer. Whether you are a beginner sewer or crafter, or an experienced one, Waverly Inspirations has something for everyone. From fabric to ribbon, from craft paint to home décor. Waverly Inspirations can help you with all of your decorating needs.
Get Social with Waverly
Check out Waverly on Instagram
Like Waverly on Facebook
See Waverly on Pinterest
Tweet with Waverly on Twitter
This post is brought to you in partnership with Waverly Inspirations and its parent company, Iconix. I have been compensated for my time. All opinions and ideas are my own. We hope you love our DIY Unicorn Head Pencil Case. Read our full disclosure policy here.
Save
Save
Save
You May Also Like
 DIY No Sew “Thanks” Fabric Bunting
 DIY No Sew “Thanks” Fabric Bunting


 Directions:

That is really cute! It looks so easy to make, I bet it would be a fun craft to do with my kiddos.
What a fun idea! It’s really cute and easy DIY! Bookmarked this.
This is such a great idea! I love how you made it so simple so everyone can do it!
I love this. What a really great idea! We just had our thanksgiving in October but this would have been great to have then! So nice.
Very cute! Got to love what you can do with hot glue in a pinch! Goodness knows I ended up using it a few times during Halloween costume prep! 😉
That looks really nice. I love how simple it looks to make too. This would be great to have for Thanksgiving.
This is so beautiful and perfect for the season. I need to get out my glue gun and get a little more crafty!
This turned out fantastic. I love to find new no sew projects to try.
This is so cute and so simple! I can’t wait to make one for the holidays.
This is so cool! What a great craft to do with my kids!
I absolutely love this Fabric DIY craft- so perfect for the holiday and a great opportunity to involve your kids in the Thanksgiving prep with an absolutely adorable bunting that I would HANG all year long from my mantle!
Love this idea and color combo you used. This would be perfect to do with the kiddos.
I am all about the no-sew craft projects since I hate sewing. This is really adorable and way easier than it looks.
That is so cute and creative. I wish I had the room to display something like this in my small apartment. I could consider a mini one though.
What an adorable way to showcase gratitude. I can hardly thread a needle, so no sew projects are a must for me.
This craft totally reminds me of my Girl Scout Days, we used to make banners like this all the time! Super cute! 🙂
This bunting turned out really nice! If I were just looking at the finished product, I would have thought it was hand sewn.
It turned out so lovely! I don’t have very many Thanksgiving decorations, but this would be such a get way to dress up my living space and get my craft on at the same time!
That turned out so cute! I love how quickly it comes together so you don’t need to break out the sewing machine.
This is adorable! I love the idea! Will try it for Christmas decorating!
I love this! Those colors are so pretty! And easy is my favorite!
This looks like a great idea.
I really like that it is a no-sewing required method.
This is so cute I love it. I pinned it for later!
This bunting is really cute! I am not very crafty but I think I can figure it out. I think yours turned out perfect!
I certainly like that it’s no sew. That saves a ton of time right from the get-go.
This is adorable and I love that it can be created without sewing! I love the details you added to it. The ribbon pieces and the painted clothespins. Such a great look!
I love no sew projects! These are so cute and would fit nicely in our decor.
This diy came out so cute. I love the choice of colors that you went with. Very Fall-ish!
I absolutely love the bunting! I am a huge Waverly fabric person. They have so many beautiful fabrics.
This is so cute and since it’s no sew, the kids could definitely help. Maybe teach a lesson with it too!
I’ve never really made decorations for Thanksgiving before. However, this is really cute and maybe I should switch it up this year!
That’s a fun and pretty DIY No sew fabric! I need to try this, looks fun!
This has to be one of the cutest and prettiest decors for Thanksgiving that I’ve seen. I love that you don’t have to sew anything!
I love this! It is so super cute and festive and looks easy enough for me to make.
Wow this banner came out amazing! I am all about DIY holiday crafting!
That looks so pretty!!! I love that it’s a “no sew” project too!
Pingback: Most Creative Thanksgiving Ideas Ever