DIY Valentine’s Day Treat Box
DIY Valentine’s Day Treat Box If you are holding any Valentine’s Day festivities at your home this season, these simple treat boxes will accompany them perfectly. Great for giving as party favors, these treat...
Paper quilling flowers are a fun craft that we enjoy in this household. The results look so good and people love getting our handcrafted creations. You can customize this with your favorite colors, team colors, or anything in between. This is such a cute frame craft. We hope that this Quilling Flowers DIY Craft post inspires you.

https://divinelifestyle.com/crafts-for-kids-spring-flowers/


We hope that this Paper Quilling Flowers DIY Craft post inspires you. Happy crafting!


DIY Valentine’s Day Treat Box If you are holding any Valentine’s Day festivities at your home this season, these simple treat boxes will accompany them perfectly. Great for giving as party favors, these treat...
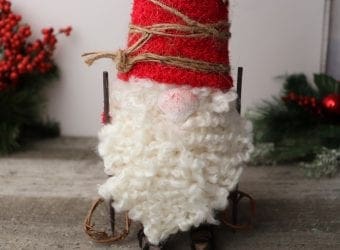
DIY Red Christmas Gnome on Skis Gnomes are just about the cutest thing ever! I have some in my yard and I have lots of other Gnome-themed things around our house. I love to...

Kool Aid Dyed and Scented Wood Letters We are all about the fun crafts for kids that look great and are functional as well. Dying wood is easy and inexpensive. When you do it...

Handprint Tree Template It’s that time of year when I start to think of fun and easy crafts my kids can create that I can later on use as gifts for family members during...