DIY Pottery Barn Inspired Metal Christmas Wreath
DIY Pottery Barn Inspired Metal Christmas Wreath
I am all about upping my Christmas decor game this year, I usually do that after Christmas because seriously there are always some amazing deals to be had. I manage to always snag some really great Christmas decor during the Target after-Christmas clearance.
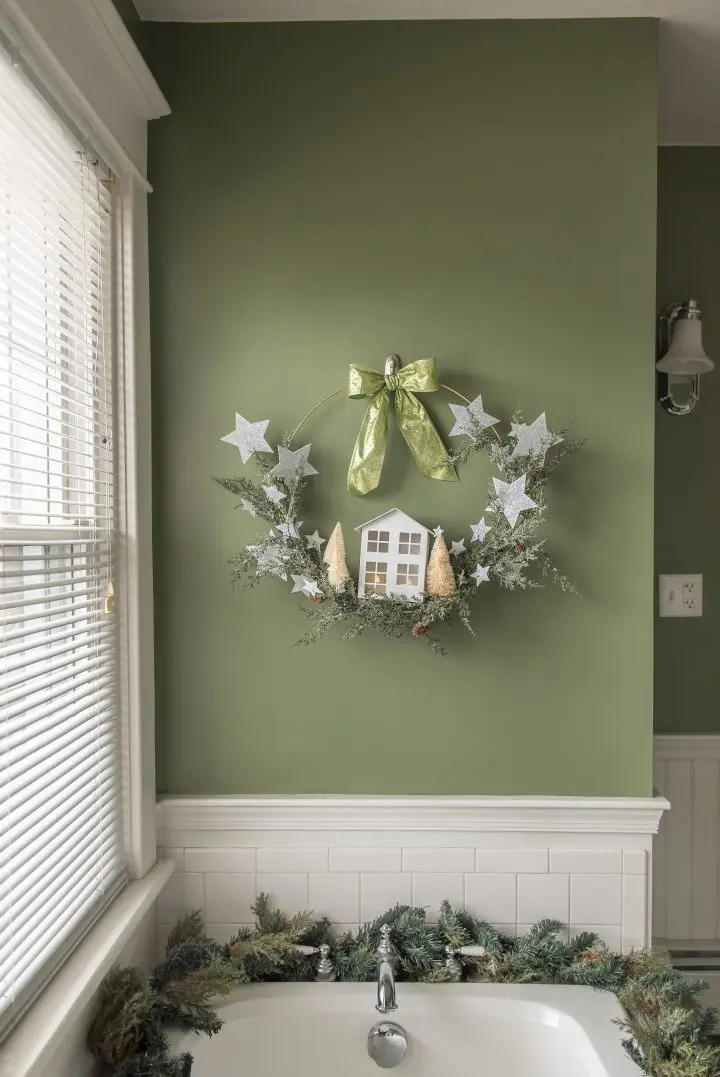
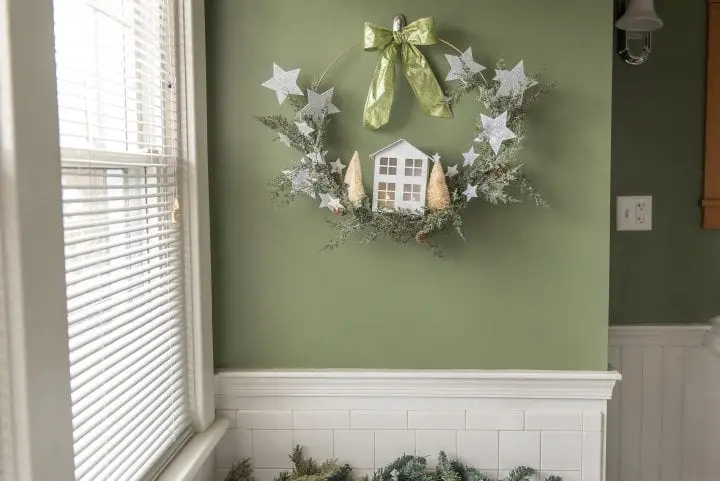
This year I am so excited to share this super adorable craft inspired by one of my favorite stores, Pottery Barn. This metal ring makes the perfect Christmas wreath. We hope that you love this DIY Pottery Barn Inspired Metal Christmas Wreath.
If you are looking for pottery barn Christmas wreaths or a metal Christmas wreath or you want Christmas decorating pottery barn style or even pottery barn Christmas decorations, this pottery barn inspired Christmas wreath will inspire your decor this year. Check out Creative Fabrica to obtain incredible Christmas svg designs!


 DIY Pottery Barn Inspired Metal Christmas Wreath
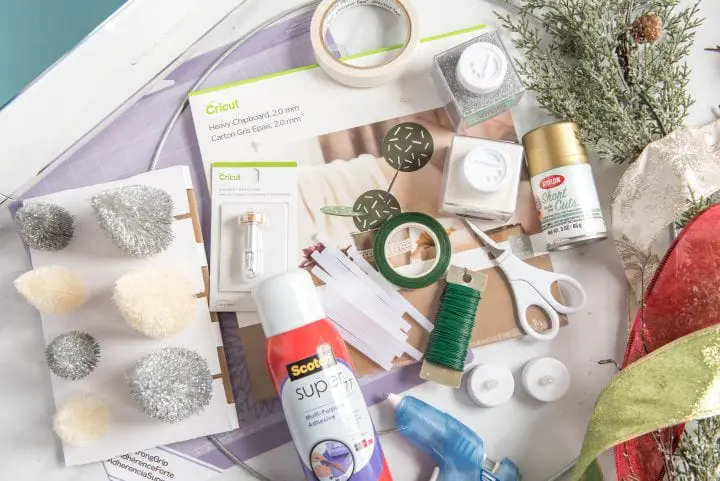
Supplies
Tips
- This project is fairly easy, but a little time consuming. Cutting chipboard on the Cricut machine can take several hours and your needs time to dry.
- This DIY Pottery Barn Inspired Metal Christmas Wreath is for indoor use only.
- The little house svg may be used for other projects like making a little village.
- You can find the metal christmas wreath rings at your local craft store or on Amazon. `
Directions for the DIY Pottery Barn Inspired Metal Christmas Wreath
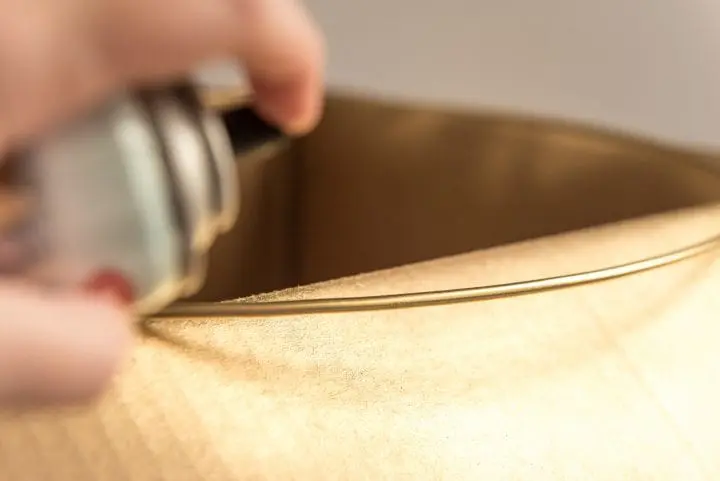
- Get an old box or newspaper to lay your floral hoop on to catch the overspray. Follow the instructions on your spray can and lightly spray your floral hoop. Once it’s dry, lightly spray again until it is completely covered. Allow to dry.
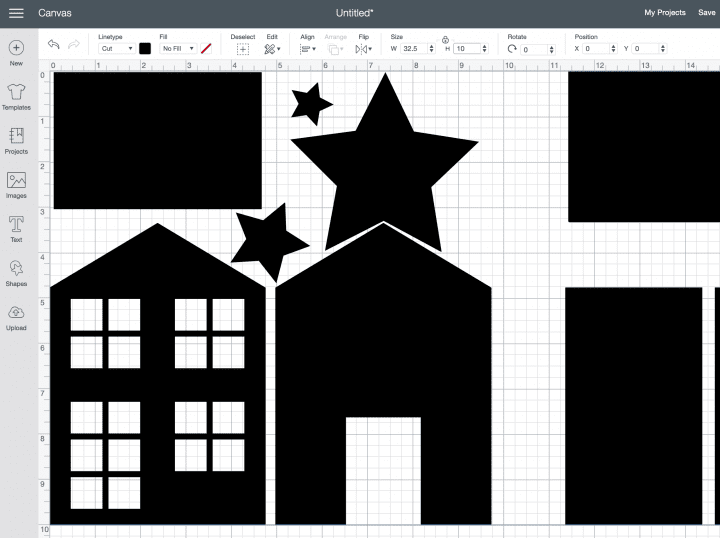
- Turn your Cricut machine on. Open Cricut Design Space and click on “New Project”. Select the “Upload” button from the left hand panel (on a desktop Mac). Then, click on the “Upload Image” button. Press the “Browse” button and navigate to the svg file for this project. Add tags for your project, and hit “Save” at the bottom right corner. On the next screen, select the image you just uploaded, and then press the “insert images” button in the lower right hand corner.
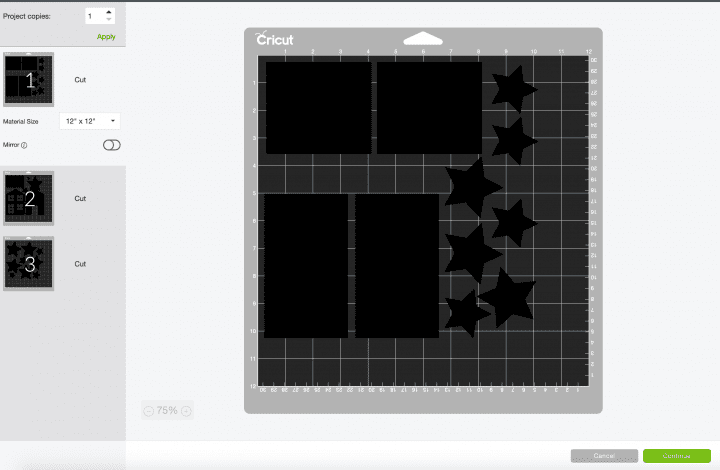
- Before doing anything else, make sure your size is set to the correct measurements: (W 32.5, H 10). Also set the position of your project to X 0, Y 0. First, you will need to select all, and press the Ungroup button. If you would like the objects to cut exactly as you see them: Once they are ungrouped, select the first set of objects and press the attach button. (There are 3 sets total) Then proceed to do the same for the second set of objects, and also the third. Select the green “Make It” button in the top right hand corner(on a desktop Mac). Select your material size. Choose the 11×11” since we are using thick chipboard. Press the green “Continue” button in the lower right hand corner.
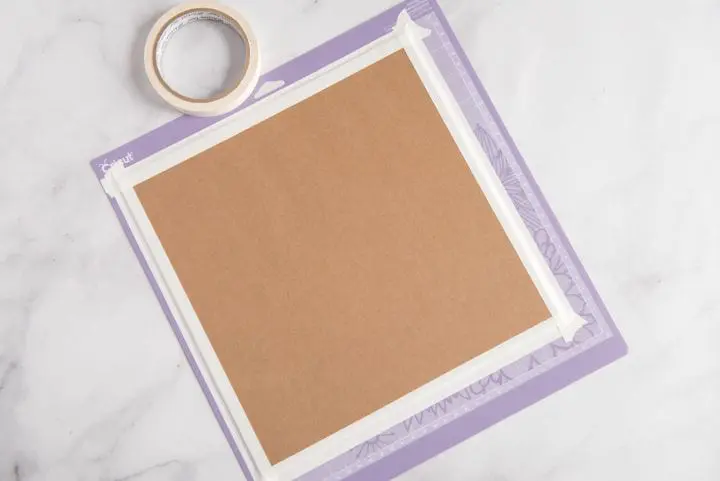
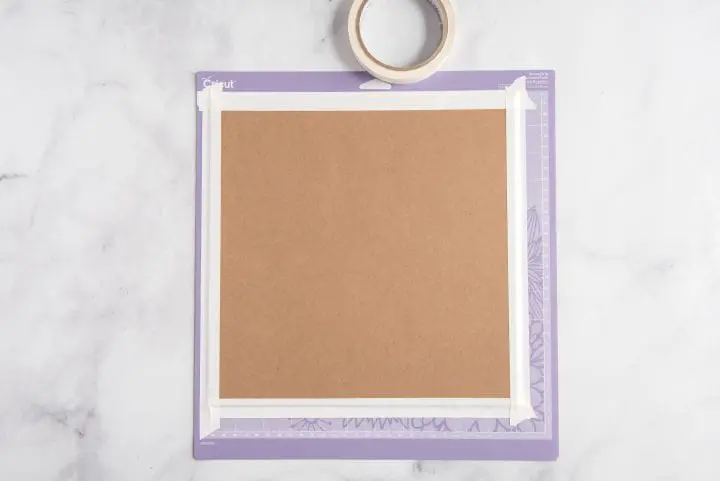
- You are now ready to make your project. Insert your Knife blade into the machine. You will have 3 StrongGrip mats to prepare. Place one sheet of the heavy chipboard in the upper left hand corner of the mat. Tape the chipboard to the mat along the edges with masking tape. Proceed to Design Space and select Heavy Chipboard 2.0 (Next, follow the instructions within the program when to load the machine, and then proceed to cut. Your machine will give you an estimated time for the cut after it makes a first pass over the chipboard.
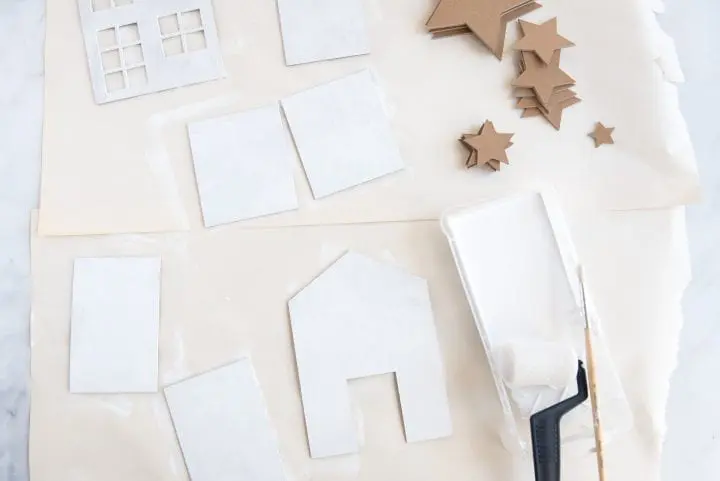
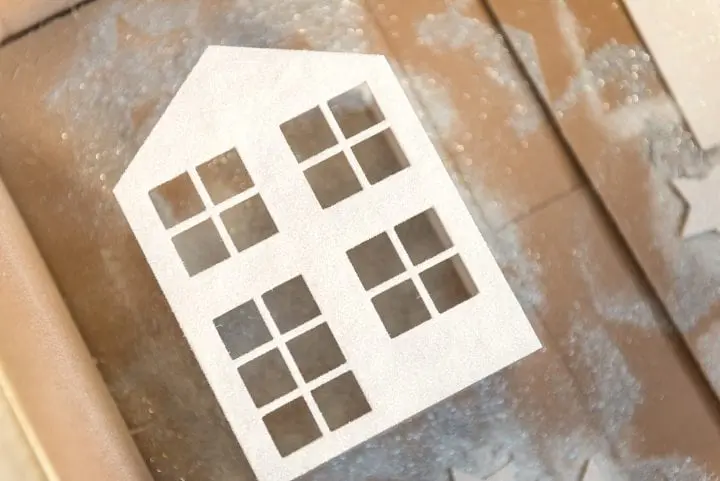
- When your cut is complete, unload the mat from the machine and remove your project. You will have a house front and back, 2 sides, 2 pieces for the roof, and 19 stars. Keep an exacto knife handy in case the machine didn’t cut the entire way through.
- Using a foam roller or foam brush and white acrylic paint, paint the front and back of all the chipboard pieces. It is ok to leave the backside of the front piece of the house unpainted since no one will see it.
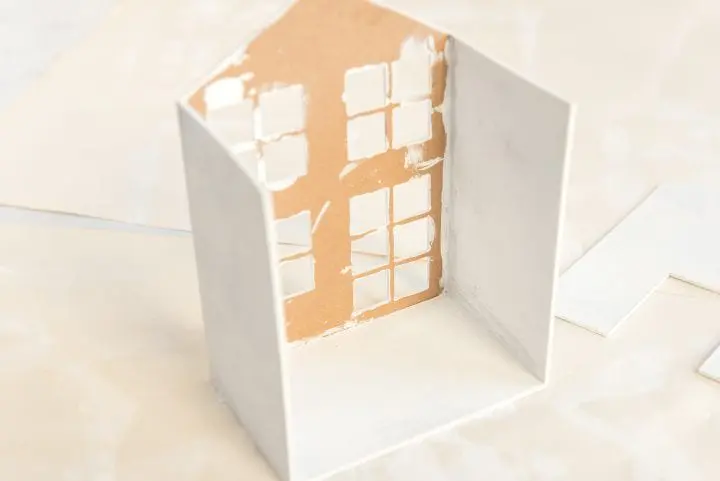
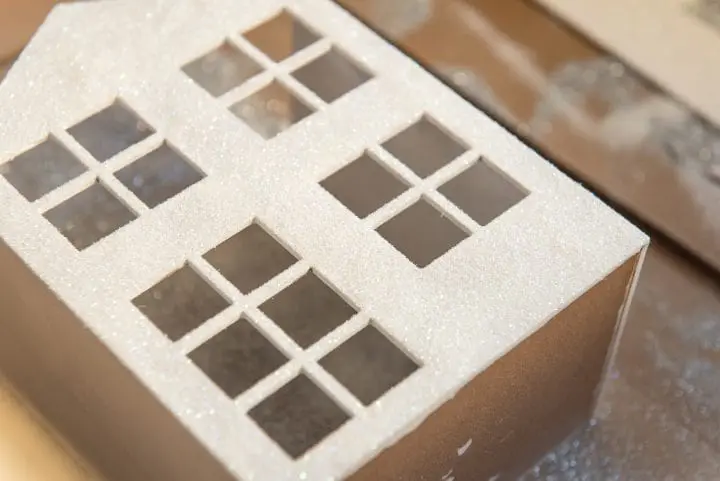
- Once dry, lay out the pieces of your house and start gluing the front, bottom and 2 sides together.
- For the glitter, get an old box or newspaper to lay your house and stars on to catch any overspray. Spray the front and sides of the house with the adhesive spray. Then sprinkle with the white glitter.
- Punch holes towards the bottom of all of the stars(except the smallest one) with the hole punch. Then spray with the adhesive spray, and sprinkle with silver glitter. Once dry, attach floral wire through the bottom of the stars and secure with hot glue to make a floral pick.
- Spray the adhesive to the tops of the house and sprinkle with silver glitter. Attach the back of the house to the front and sides. When the rooftops are dry, use school or craft glue to secure it to the top of the house.
- Using hot glue, secure the smallest star to the top of one of the bottle brushes.
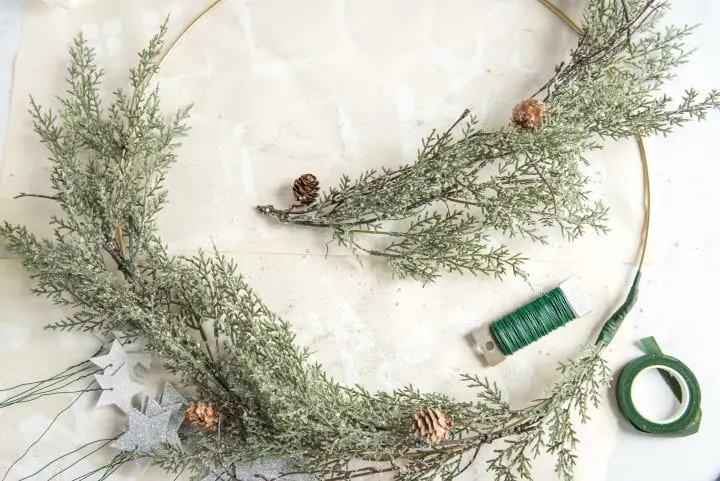
- For the wreath assembly, gather all of your wreath materials. Cut your garland in half. Secure one half of the garland to the left side of the hoop with floral wire and then cover with floral tape. Do the same for the right side. Attach the stars by wrapping the wire around the hoop. Secure with hot glue if needed.
- Attach the base of your little house in the center bottom of the wreath with hot glue. Glue 3 bottle brush trees off to the sides of the house. 4. Attach a bow to the top of your wreath and enjoy!


Whether you were searching for pottery barn Christmas decorations home, pottery barn wreath hanger, Christmas decorating ideas pottery barn, pottery barn inspired Christmas decor, pottery barn wreaths Christmas or even Christmas tree decorations pottery barn, this pottery barn wreath has you covered.
We hope that you are inspired by this DIY Pottery Barn Inspired Metal Christmas Wreath. Happy crafting!


You May Also Like


Pingback: Free Printable Red Buffalo Plaid Christmas Gift Tags
Pingback: Tech's Impact on Fashion Trends & Consumer Markets